- On the toolbar, click Add Shape button.

- On the toolbar, click the Add Shape arrow
 ,
point to Arrow and then select the arrow of your choice.
 - On the Insert menu, point to Shapes, then point to Arrow and then select the arrow of your choice.

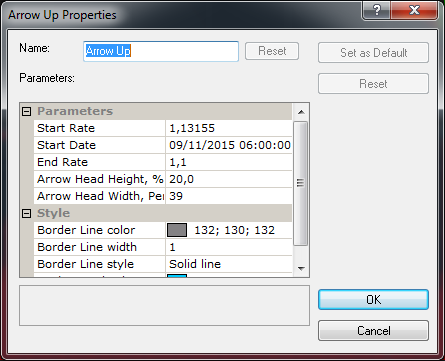
Note: To restore the default arrow name, click Reset.
- To change the price and date and time at which the arrow starts or ends, in the
appropriate Start Rate and End Date boxes, select or type price and date and
time values of your choice.
Notes: - To apply the modified properties (except the name) to all further arrows by default, click Set as Default.
- To restore the factory settings, click Reset.
- To change the border line style, in the appropriate boxes of Border Line, click the color, style and width of your choice.
- To change the background color, in the Background box, click the color of your choice.