- On the toolbar, click the Add Fibonacci arrow
 , and then click Add Fibonacci
Channel.
To choose the drawing mode, point to Add Fibonacci Channel and then click a mode of your choice. - On the Insert menu, point to Fibonacci, and then click Add Fibonacci Channel.
- Right-click in the chart, point to Chart Elements on the shortcut menu, and
then click Add Fibonacci Channel.
To choose the drawing mode, point to Add Fibonacci Channel and then click a mode of your choice. - Press Ctrl+Alt+O.
* When a chart is opened within the FXCM Trading Station, you can also select the tool in the following way:
On the Charts menu, point to Insert, point to Fibonacci, and then click Add Fibonacci Channel.
The points adjust automatically according to the selected drawing mode if needed.

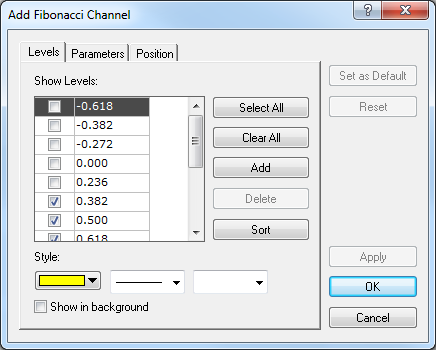
- Under Show Levels, in the list of available levels, select or clear check boxes at your choice.
Notes: - To select all available levels, click Select All.
- To clear the selection of levels, click Clear All. Note that to be able to add Fibonacci Channel to the chart, at least one level must be selected.
- To edit a level value, click the appropriate row, double-click the current value, type a new value, and then press ENTER.
- To add a level, click Add. An empty row is added to the list. Type a value of your choice, and then press ENTER.
- To remove a level, click the appropriate row, and then click Delete.
- To sort the levels in ascending order, click Sort.
- In the appropriate Style boxes, select the tool lines' color, style, and width of your choice.
- To show the Fibonacci tool in background, select the Show in background check box. Otherwise, clear the check box.

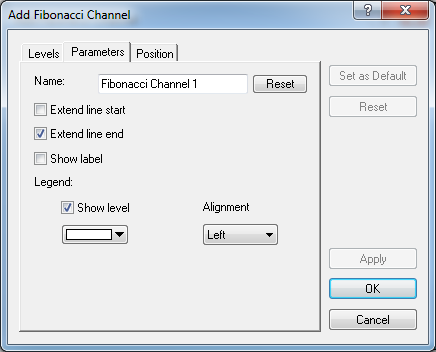
- In the Name box, type a name of your choice.
Note: To reset the default Fibonacci tool's name, click Reset. - To extend the level lines beyond the starting points, select the Extend line start check box. Otherwise, clear the check box.
- To extend the level lines beyond the ending points, select the Extend line end check box. Otherwise, clear the check box.
- To show the Fibonacci tool's label, select the Show label check box. Otherwise, clear the check box.
- To show level values in the legend of the level lines, select the Show level check box. Otherwise, clear the check box.
- To specify the color of the level value, in the appropriate box, click the
Arrow button
 , and then from the
Color palette, select a color of your choice.
 - To specify the alignment of the legend, in the Alignment box, select an alignment of your choice.

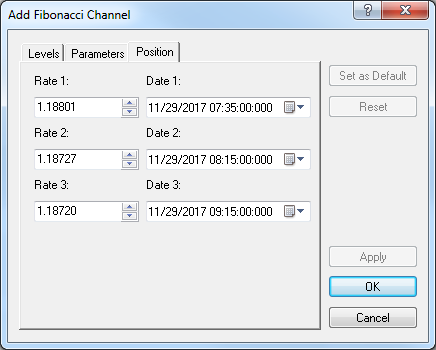
- To specify the position of the starting and ending points of the base channel lines, in the appropriate Rate and Date
boxes, select or type values of your choice.
Notes: - To apply the specified properties (except for Name) to all Fibonacci Channel tools to be added in the future by default, click Set as Default.
- To restore the factory settings, click Reset.