How to Start Simulation Mode
Brief
The article explains how to start Simulation Mode.
Details
On the the FXCM Trading Station, you can start Simulation Mode both in the Logout and Login states.
To start Simulation Mode
- Do one of the following:
- On the System menu, point to Simulation Mode, and then click New.
- On the toolbar, click the Enter to Trade Simulation Mode button.

Note: When the trading station is in the Login state, after either of the steps, a warning notice appears.

Click Yes to proceed.
- The Simulation Mode dialog box appears.
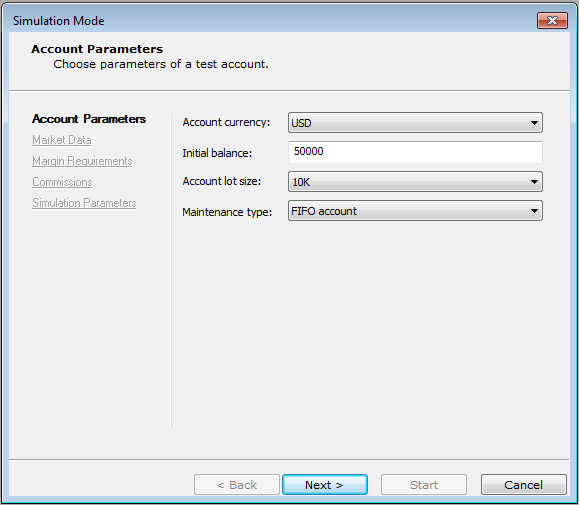
- By default, the dialog box opens on the Account Parameters page. In the right-hand panel of the page, specify the following
parameters:
- Account currency allows specifying the simulation account's currency. To specify one, click in the Account currency box, and then click a
currency of your choice.
- Initial balance allows specifying the simulation account's initial balance. To specify one, in the Initial balance box, double-click the
available amount and type a new one of your choice.
- Account lot size allows specifying the simulation account's lot size. To specify one, click in the Account lot size box, and then click a value
of your choice.
- Maintenance type allows specifying the way the simulation account is to be maintained. To specify the way, click in the Maintenance type box,
and then click a way version of your choice.
- Click Next.
- The dialog box opens on the Market Data page.
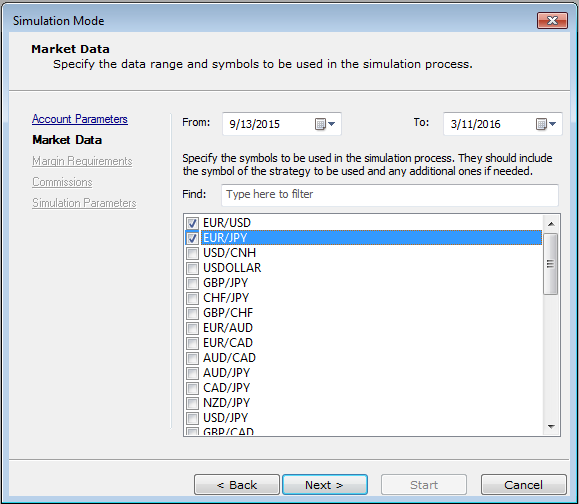
- In the right-hand panel of the page, specify the following parameters:
- In the From and To boxes, specify the beginning and ending dates of the data range, over which the simulation
is to be carried out.
To specify the dates, type their values in the respective boxes or click dates of your choice in the respective drop-down calendars.
- In the list of available symbols, select the check-boxes of symbols of your choice.
- Click Next.
Note: If the specified volume of data is too big to download (the data range is too large or/and the selected symbols are too many),
an error message appears. Its context may vary. Here are two examples of the messages:


- Adjust the values as required and click OK.
- The dialog box opens on the Margin Requirements page.
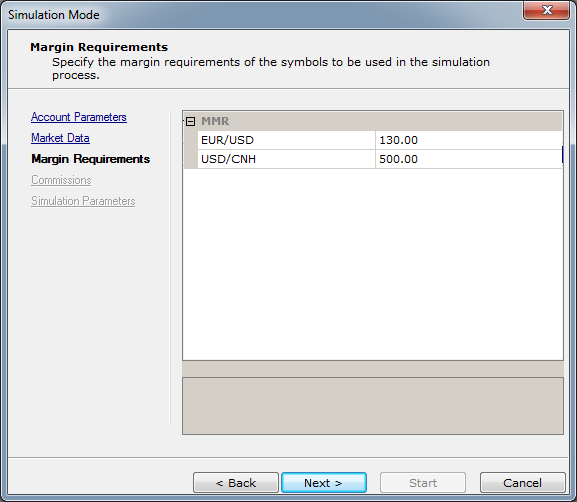
- In the right-hand panel, under MMR, click a listed symbol and type a value of your choice.
- Click Next.
- The dialog box opens on the Commissions page.
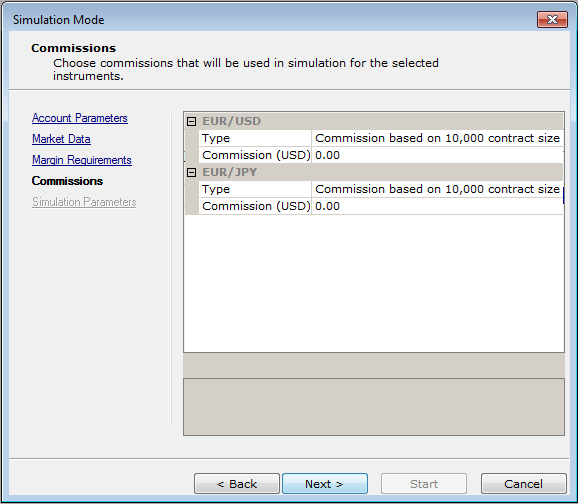
- In the right-hand panel of the page that lists the previously selected symbols, specify the following set of parameters:
- Type allows specifying the symbol's commission type to be used in the simulation process. To specify a value, click in the
row, click the arrow button, and then click a commission type of your choice.
- Commissions (USD) allows specifying the amount of commissions to be charged for performing a particular operation.
To specify the amount, click in the row,, and then type a value of your choice.
- Click Next.
- The dialog box opens on the Simulation Parameters page.
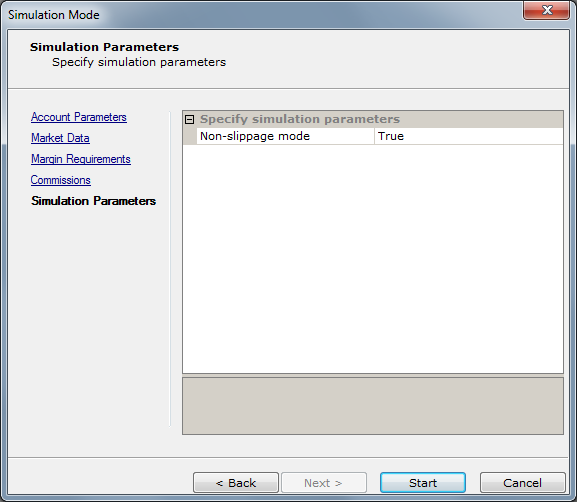
- In the right-hand panel of the page, specify the following parameters:
- Non-slippage mode - allows to choose between using and not using the non-slippage mode. To use the mode, click in the
row, click the arrow button, and then click True. Otherwise, click False. If the Non-slippage mode is chosen,
an order is executed at the price set by the trader during its creation. Otherwise, the order is executed at the market price.
- Click Start.
To exit Simulation Mode, do one of the following:
- On the System menu, point to Simulation Mode, and then click Logout.
- In the Control panel, click the Exit Trade Simulation Mode button.

back


